Multicolour Waste

When I took the plunge and bought a Bambu A1, I got the AMS Lite multi-material system that allows you to load four different filaments at once and automatically switch between them. I decided to go for this as it’s significantly cheaper to get it bundled that buy it at a later date, and it seemed like a big step up in quality-of-life in terms of not having to swap spools all the time, and automatically switch over to a new one when the old one runs out.
The headline capability of the AMS Lite, though, is multicolour printing. I don’t see myself doing much of this, but it’s nice to have the option, and after I’d tried a few standard prints with the included filament sample I decided to give it a go. The way the AMS implements multicolour printing, namely swapping multiple filaments in a single print head, entails quite a bit of overhead both in time, and in waste plastic as the printer flushes out the previous one. However, I’d not quite steeled myself for just how much an overhead this was.
Firstly, time. The standard, single-colour Benchy that was my first print took 21 minutes. In contrast, the identically sized four-colour Benchy I found as a test1 took over nine hours — so long that we had to pause overnight (on the plus side, the print resumed perfectly in the morning). This is a massive increase, but in the grand scheme of things is probably manageable.
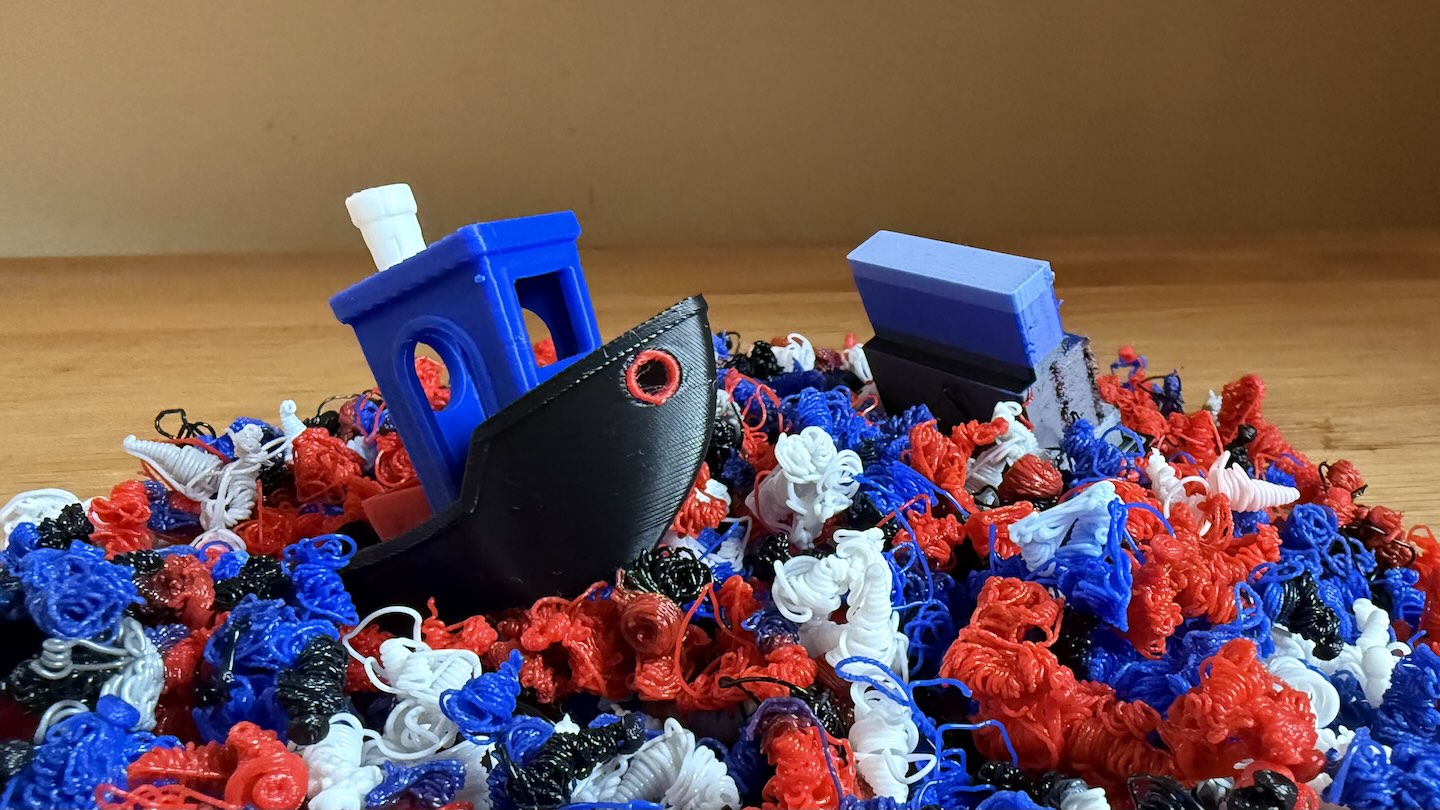
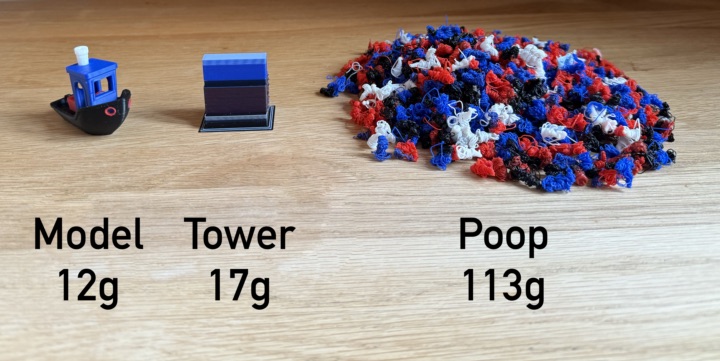
More striking is the amount of waste plastic. Every time the printer feeds in a new filament, it needs to extrude a small amount of plastic to clear out the nozzle. Each poop (this appears to be the term of art) is only a fraction of a gram, but if you need to do up to four for each layer, over hundreds of layers, it adds up. Moreover, when printing multicolour, it’s also advisable to print a priming tower, an extra area on each layer to ensure the new colour is coming through cleanly before printing the model itself. Together, the tower and the poop added up to more than ten times the material used in the model itself:

This model is intentionally a bit of a stress test for multicolour prints, but nevertheless isn’t doing anything pathological — it’s probably a good analogue of what you’d get if you applied colour to an existing model without any particular thought about optimising it. That said, I also didn’t put any effort into the print settings; I just hit go.
The amount of waste in this print is somewhat shocking, but it represents a worst case. This video contains some tips to significantly reduce waste, and the latest version of Bambu Studio is smarter about the purge amounts between different pairs of colours (basically, you need to purge less going from a lighter colour to a darker one). What’s clear is that this isn’t going to be something that works straight out of the box; a bit of effort and thought is required.
One key takeaway is that the waste is very dependent on the number of layers, rather than the volume of the model as a whole. Hence, I can see myself using it for things like signs — large, flat pieces that would benefit from embedded colour changes but have relatively few layers. This seems like an instance of a larger point; you need to consider the printability of your model throughout the whole process, rather than just throwing it into the slicer at the end and assuming you’ll get good results. It’s this kind of lesson that makes picking up a new hobby enjoyable.
-
“3D Benchy AMS test - 4 colors”, remixed by Liam Meakins — this appears to have been removed from MakerWorld since I printed it. [back]